
|
| Elliott Sound Products | Project 93 |

 PCBs for the discrete mic preamp are available - click on the image for details.
The purpose of this article and small group of projects is firstly to introduce the electret microphone into the ESP projects lineup, and secondly to allow the reader to build a microphone that although uncalibrated, can be used to great effect as a measurement mic with any loudspeaker project, or for very high quality recordings. The P93 microphone amplifier is a discrete fully Class-A transformerless design, and offers high performance at comparatively low cost.
Traditionally, measurement microphones are calibrated, so that the exact output level for a given SPL is known, and so that the frequency response is predictable and accurate. These are fine goals, but few hobby speaker builders can afford (or can justify) the expense of a fully calibrated measuring set, or even the microphone by itself.
The measurement mic project here is not calibrated for level or response, but relies on the reasonably predictable performance of electret microphone units. These are readily available, very cheap (less than $5.00 in any currency), and are usually surprisingly good - except for those that aren't, and there's no way to tell in advance  . Equally sadly, the Panasonic WM-61A capsules have been discontinued, and I don't know of a reliable supply of an equivalent.


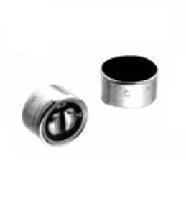
Figure 1 - Typical Electret Capsules (a) and Frequency Response (b)
Figure 1 shows what they look like, and a typical frequency response (Panasonic capsules and response are shown - but this is also typical of many others). This is extremely good performance, and is fairly close to what you can expect if you can get decent capsules.
Additional microphone projects will/may be presented when I get the opportunity, with some hopefully interesting variations to the concept of a basic microphone as described here. Most recording applications will require a directional mic, and these may be discussed in a follow-up article. Unfortunately, the casing is much more complex and critical for a directional mic than for an omnidirectional version - fortunately, measurement mics need to be omnidirectional, so that limitation is not a problem.
Sensitivity
In some cases, the sensitivity of a mic will be expressed in a manner that doesn't tell you a thing. Giving a 'specification' of (e.g.) 69dB is simply pointless, and as such must be ignored and/or ridiculed because it doesn't mean anything. The sensible (and correct) way to rate a mic or mic capsule will always reference the sensitivity in terms of dBV or dBu per Pascal. One Pascal is 94dB SPL, and from this you can work out the voltage you will get at any input level. To be truly sensible, the spec will also provide the supply voltage and feed resistor used to obtain the sensitivity quoted. For example, it may be from a 1.5V supply and using a 2.2k DC feed resistor.
If a mic is rated at -35dBV (referred to 1V RMS) at 1Pa, then the output level can be determined easily ...
-35 dBV = antilog ( -35 / 20 )
= 10^ ( -35 / 20 ) = 17.8 mV
So, this mic will provide an output of 17.8mV at 94dB SPL, or 1.78mV at 74dB SPL. In some cases the level may be specified as dBu or dBm, and both have a reference level of 775mV rather than 1V. To convert the output level back to dBV, simply multiply the voltage by 1.29 (1.3 is close enough). If the mic has no sensible specifications (essential references omitted), then you can only estimate the level you'll get based on a 'typical' mic, and you should normally expect somewhere between -34dB (20mV/Pa) down to -44dB (6.3mV/Pa).
As noted at the end of this article, electret mics have a limit to the SPL they will tolerate before distortion. Consider a capsule operating from a 1.5V cell. If its sensitivity is -35dB (ref 1Pa) as seen above, and you were to subject the mic to a SPL of 114dB (20dB above the reference level), the output will be 178mV RMS ... in your dreams. The mic will distort. Using a higher supply voltage and/or a higher feed resistance will usually provide more output level for a given SPL, but generally doesn't increase the overload level to any worthwhile degree.
There's a wide range of electret capsules available, and a predictably wide range of quoted sensitivities. Unfortunately, many sellers don't use a specification that's of any real use, and that makes it much harder to work out how much output you'll get for the expected sound level you'll be recording. For measurement applications, unless you have (or have access to) a calibrator, you can only perform relative measurements.
To give you some idea of what you can expect, I tested a 6mm capsule powered from 5V and using a 5.1k feed resistor. The average SPL in my workshop (from the radio via my workshop system) was 65dB (unweighted), and I measured an average output level from the mic of 2.5mV RMS. The level is close enough to 30dB below 1Pa (94dB SPL), so that indicates an output of 79mV at 1Pa - considerably higher than the typical level from most capsules. It works out to -22dBV referred to 1Pa, which is pretty good.
Traditionally, electret mics are powered from a 1.5V cell, in a very simple circuit as shown in Figure 2. Shown is the schematic for a Radio Shack 'Boundary' microphone, and this is actually more complex than most - the inductor is not usually used (and I'm unsure why anyone thought it was a good idea, since it makes the mic sensitive to magnetic fields). Like all such simple circuits, this has some very real disadvantages.

Figure 2 - Typical Electret Microphone Schematic
The disadvantages of the standard method (and 'budget' commercial electret microphones in general) are ...
There is naturally at least one advantage ...
The disadvantages have caused such mics to have a poor reputation, however, with some additional work excellent results can be achieved. The first objection is easily resolved with an opamp to buffer the output, making sure that the output impedance is kept low. It is easy to achieve an impedance of 100 ohms or so, and this will drive any mixer.
The second objection is resolved by increasing the supply voltage. 1.5V is simply too low to be useful, and a supply of 5V or more is recommended. This in turn solves the next two problems as well, since with more signal from the mic the noise contribution is lower, and a higher supply voltage allows much more output voltage before distortion.

| Note that if the supply voltage is increased, the feed resistance should also be increased. Doing so gives more output level, but the impedance is higher. This must be dealt with, or there will be excessive high frequency losses due to cable capacitance. Specifications (where provided and useful) never suggest a supply higher than 1.5V, but I've used a great many electret capsules with high supply voltage (5-10V DC) and have never seen a failure. |
The lone advantage remains, and we can't change that ... but we can use it to our benefit. The idea that something so cheap is capable of excellent performance is somewhat disconcerting - the expectation is that if it is very cheap, it cannot have high performance. This is actually not the case at all.
I have used a modified hyper-cardioid electret mic (which cost less than $50 at the time) and achieved excellent results for recording voice announcements (in a professional capacity). In many cases, the quality was better than that from several recording studios that had been used previously, even though the recordings were done in an ordinary (but reasonably quiet) room, and having no specific acoustic treatment. Most recordings were done in a normal office.
The original mic was housed in a plastic case, with zero shielding (so it picked up lots of electrical noise), and used a 1.5V cell as its power source. After modification, the case was fully shielded, and it used a modified power feed directly from the mixer - not 48V phantom power, just the 15V supply from the mixer itself. Output level and signal handling ability were increased dramatically, and the results were very impressive indeed - all for $50 or so, and a bit of modification.

Figure 3 - Remote Powered Electret Measurement Mic
Figure 3 shows a simple remote powered microphone schematic - this can be used directly as a measurement mic with a 9V battery, and will give very good results as long as lead lengths are kept short. Generally, a circuit such as that shown should only be used with a maximum of a metre or so of low capacitance cable. If this is not enough (and it usually won't be), it is necessary to use an amplifier to reduce the output impedance. It is usually worthwhile to include some extra gain as well as shown in the schematics below.
The standard 'off the shelf' electret mic may not be calibrated, but typical inserts will be acceptably flat from 20Hz to 10kHz, often with a 3dB rise at 18kHz before rolling off again. A typical response graph is shown above in Figure 1b. While it is obviously impossible to guarantee that the one you get will be the same, it is unlikely that it will be wildly different.
I have included a photo of my prototype probe, and based on initial tests, seems to be remarkably close to a Behringer measurement mic that I have performance wise, but a great deal cheaper. The output is very high with either of the amplifiers shown below - I have measured about 50mV at 70dB SPL, and it has a clean undistorted output at 100dB SPL of almost 1.6V RMS. Based on this, it is obviously not suited to measuring extreme SPLs, but as a measurement mic it is perfect.

Figure 4a (Top) - Behringer Measurement Microphone
4b (Bottom) - My Prototype Measurement Mic Probe
The long tube ensures that there is minimal diffraction interference from the casing and/or mic stand, and the final unit has a turned aluminium casing, and is phantom powered. Since the PCB needs to be very small, it was not possible to finish the unit until I had PCBs made - these are approximately 12.5 x 50mm (or 0.5" x 2"), and have been available for some time (see the ESP Pricelist for pricing). The prototype amp was built first, and works extremely well (see Project Proper, below), but alas is too big to fit into the casing.

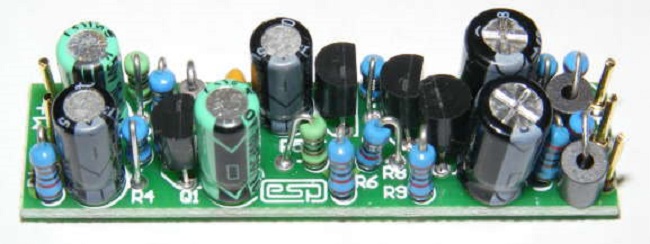
Figure 4c - Photo of Completed Preamp
Figure 4c above shows what the preamp looks like. I attached mine directly to the modified XLR connector, using PCB pins carefully bent to fit the receptacles of the XLR. The connections on the board are designed to align with the XLR connections for exactly this purpose. Despite the use of standard (as opposed to miniature) 100uF/16V caps throughout, the completed assembly does fit into the casing perfectly - there is not a lot of room for error, but it does fit. This was my intention from the outset, and the idea is to be able to use a standard 19mm (3/4") inside diameter tube to match the connector diameter.
I used to provide kits to make mics as shown above, but the materials cost and the time needed to make them was disproportionate to the selling price and they are no longer available.
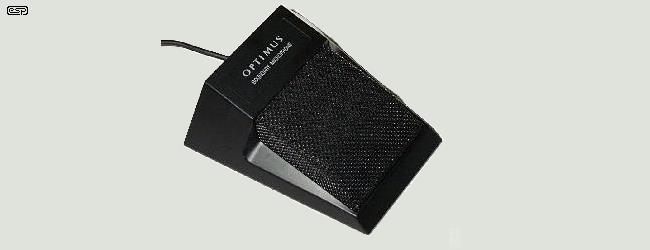
The original Pressure Zone Mic was developed quite some time ago, and I have one of the very first ones that were available (manufactured by Wahrenbrock). Crown Audio has been making these since 1980, and Radio Shack (known as Tandy in Australia) also makes one (now called a boundary microphone) that is easily modified to be of near studio quality. Again, all it needs is a decent power supply, and a buffer or amplifier to ensure that the output impedance is kept low (and balanced) to match up with professional mixing desks. The original Radio Shack unit was a true PZM microphone, but it must be noted that the new ones are not - similar, but not the same. See Figure 2 for the schematic of the standard unit.
To make the modifications, the case does not even need to be undone. If you want to see what's inside, the latest ones have 4 screws under the rubber pad on the bottom, and this must be removed. It is attached with double sided tape (such as carpet tape or similar, which can be used to re-attach it when you are done playing). There is a small PCB inside amongst some medium density foam. The top piece can be removed, and the mic terminals are then accessible. The 2.2H iron cored choke (of rather dubious quality) is simply left disconnected, by not using the white wire in the shielded pair to the switch unit and battery holder (these will be discarded). The inner wiring from the mic unit is connected to the new preamp board using a suitable connector on the existing cable from the mic. A fixed lead is not recommended, but you don't have much choice at the mic end unless you really do want to dismantle it. The shield is the mic negative terminal (and also the case), and the red lead carries the signal.

Figure 5 - Radio Shack (Tandy) Boundary Microphone
Using only the shield and red lead (microphone connection - see Figure 2, above for internal schematic), this mic unit can be connected to the preamp shown below. It can then be phantom powered for theatre or other performance recording or sound reinforcement, and gives a very good account of itself indeed.
Figure 6 shows the project preamp - a balanced mic line driver. This is suitable for use with phantom or battery power, and is easily adapted for either (as described below). This preamp has a PCB which is available, and is suitable for use with any of the microphones shown in this article. Suitable for measurement or recording, it has high output, low noise, and may be powered from a 9V battery or phantom power from 30V to 48V. The load resistance/ impedance should be at least 1k, but this is actually considerably lower than most preamps, so will not cause a problem.

Figure 6 - Project Balanced Mic Line Driver
The preamp is very similar to the DoZ preamp - the topology is identical, but it has been modified to use a lower supply voltage. The amplifier is a single ended Class-A, current feedback circuit, which has extremely good linearity, wide bandwidth and is unconditionally stable. Ferrite beads (F1 and F2) are recommended at the outputs. The output pins shown are the normal connections to an XLR audio connector, with Pin 1 as ground, Pin 2 is 'hot', and Pin 3 is audio return ('cold'). The output actually is balanced, but is asymmetrical - this is very common, and the same basic idea is used by many premium studio microphones.
All resistors should be metal film, and electrolytic caps need to be rated at 16V. The 100uF units shown for C5 and C6 may be reduced to 33uF for recording use, but to maintain response down to 10Hz for measurement, use 100uF as shown.
To use the preamp on battery power, simply leave out R10 and R11, and connect the battery to the +VE terminal. Note that C5 and C6 must be reversed if you plan on using battery power, and D1 should also be omitted. Current drain is quite low (about 5mA maximum), so a 9V battery should last quite well. The mic must never be connected to phantom power if it's adapted for battery usage, because C5 and C6 would be reverse biased and will fail. As noted above, PCBs are available for this version - they are tiny, and will fit easily into even small microphone housings.
This preamp can be used for a modified 'boundary' mic to make a high performance measurement microphone, or to convert a cheap directional mic into something of near professional quality. It won't be the equal of a Neumann, Sennheiser or other expensive studio microphone, but it won't set you back over $1,000 either  .
.
This section is primarily for information only. In general, I would not recommend any opamp as a mic amplifier due to noise. There are certainly a few opamps available now that may be good enough, but most really low noise (and low distortion) opamps require significant operating current.
Getting enough current from the phantom supply of a mixer is not a trivial task. If the two 6.8k feed resistors are shorted to ground, the maximum available current is only 14mA, but with no voltage at all. For a workable current of (say) 10mA, the maximum available supply voltage is 14V DC. Getting the current as low as possible is a fine goal, but all opamps need some current to operate, and the powering circuit shown in Figure 7 is a relatively simple way to achieve the desired results.
This is the receiving end of the phantom supply, and it powers the microphone and opamp line driver. This circuit can be expected to handle sound levels up to about 110dB, and possibly more - this is more than sufficient for any microphone that is not used in close proximity to loud vocals or instruments. Although U1A is shown with a gain of 2, this can be reduced to unity by removing R8 and shorting R9 so that U1A is a unity gain buffer. Note that this will decrease the signal to noise ratio, and the mic will be a little noiser.

Figure 7 - Balanced Phantom Feed Opamp Mic Amplifier
A similar (but slightly more complex) method for deriving the DC from the signal lines is used by Crown in their PZM microphones, and similar circuits are also used in other (similar) mics. How does it work? It is actually quite simple. Q1 and Q2 are operated as current sinks, and the load is connected to the emitters. Because a current sink (or source) has an extremely high impedance on the collector, there is minimal loading of the signal lines. The DC appearing at the bases is filtered by C1, so the collectors only 'see' the DC - the AC signal is left untouched except at extremely low frequencies (less than 1 Hz for the circuit shown above). R14 (marked **) is described as 'S.O.T', or select on test. This resistor needs to be chosen so that the DC is about 10V with a normal phantom supply of 48V. A zener may be used instead, which will give a little more voltage range - depending on the opamp used.
R3 is used to ensure that there is some voltage across the transistors, and the differential must be greater than the expected peak output. As shown, the differential is about 3V, so a 6V peak to peak signal can be accommodated - this is equivalent to an output level from the microphone of almost +10dBm! This circuit has been built and tested, and works well. Output level is about the same as the discrete version shown in Figure 6, but it is more complex, and a board cannot be made small enough to fit inside a slim microphone housing without resorting to surface mount devices.
The most common variant of my simplified DC 'extraction' circuit uses a transistor as a capacitance multiplier instead of just a capacitor. This has not been found to be necessary in practice for the schematic as shown, and I have found that it works very well without the extra complications.
My prototype preamp used a OPA2134 (a relatively high current opamp), and gets a working voltage of a little over 10V with 48V, 6.8k phantom feed. The output level capability is extremely high - 2V RMS can be achieved quite easily by speaking directly into the mic ... LOUDLY! In all, this is an extremely capable preamp, with excellent specifications and performance. If demand warrants it, a surface mount version of this preamp may be made available at a later stage, as this is the only way to get the size down so it could be used in a slim microphone housing. For low level recording work, noise will become an issue though.
It must be realised that all electret mics (indeed, all mics) have one limitation we cannot readily change, and that is maximum SPL. Because electret capsules have an integral amplifier, there will always be a level where they will distort. A capsule having a 10k feed resistor and supplied from a 15V supply will output well over 1V RMS quite easily, simply by having it close enough to your mouth as you speak loudly. Even professional microphones (including dynamic types) are quite capable of 0dBm in close proximity to a floor tom or a loud singer. As a result, close vocal work, drums and brass instruments (trumpet, sax, etc) are capable of extremely high SPL, and are not really suitable candidates for electret mics. It is possible to get good performance at up to 115dB SPL quite easily - possibly more.
The sensitivity can be reduced, simply by reducing the value of the feed resistor. Again, there is a limit, as the internal FET amplifier can be driven into distortion regardless of what you do on the outside of the capsule. It is feasible to modify the capsule itself - but this is only possible with some models unless you are willing to make a few sacrifices (you can guarantee that you will ruin a couple in the process).
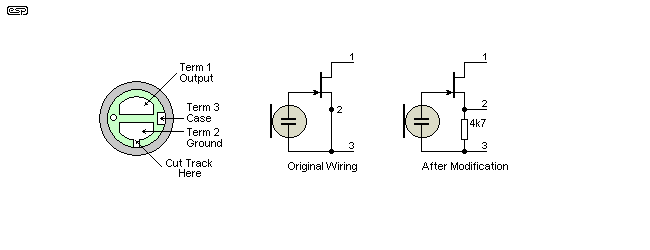
This I shall leave to the individual constructor. One possibility if using a Panasonic mic insert, is that the external track on the PCB can be cut, and this gives access to the source of the internal FET. As shown in Figure 6, this little track can be cut, and the mic is then rewired with the FET as a source follower. I do not know what the maximum SPL that a mic modified in this way will take, but it is considerably higher than an unmodified electret capsule. Expect the microphone polarity to be reversed if you do this. The standard insert produces a positive voltage for an air compression because the electret is wired to do so.

Figure 8 - Modifying a Panasonic Electret Insert
This modification was originally suggested by Siegfried Linkwitz for his cosine burst generator (see Project 58). Note that this is only known to work with the Panasonic capsule, but others may be able to be adapted in a similar manner.
The drain connection is connected to the power source with no series resistor, and the output now comes from the source (Terminal 2). There is no amplification, so expect the output level to be quite a bit lower than normal. Output impedance with a 4.7k source resistor is somewhat less than 4.7k, but it still requires an opamp (or transistor) buffer to prevent current saturation in the FET if connected to any typical mic preamp.
 Main Index
 Projects Index